
The most common brief in Indian towns: parking on the ground, the home on the first floor. Here is the whole job, from a new client to a quotation. Don't start with the compound wall: let the app know the plot first and it draws the compound wall for you.
Before you start
Have the plot width and depth, which side the main road is, any other road sides (corner plot), the setbacks your local body asks for, the stilt height the bylaw allows, how many bedrooms, and whether the client follows Vastu.
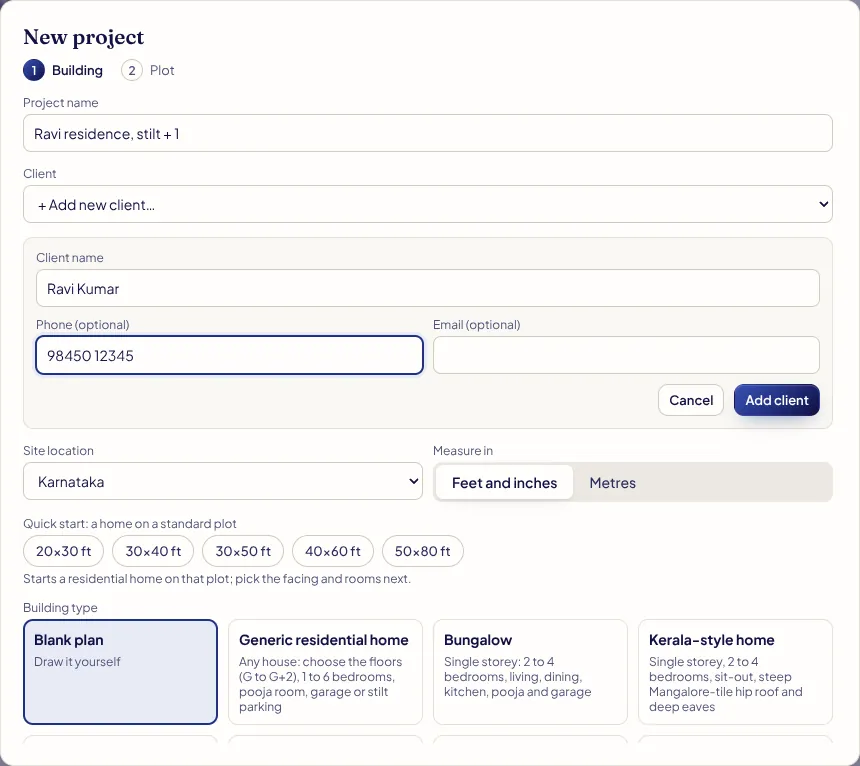
1. New project and the client
Press New project. Type the project name, and under Client pick + Add new client… to add them right there (name and phone; the design link goes to that number on WhatsApp). Check Site location (it sets local building practice, rates and GST) and Measure in.
2. Pick the building and set the site
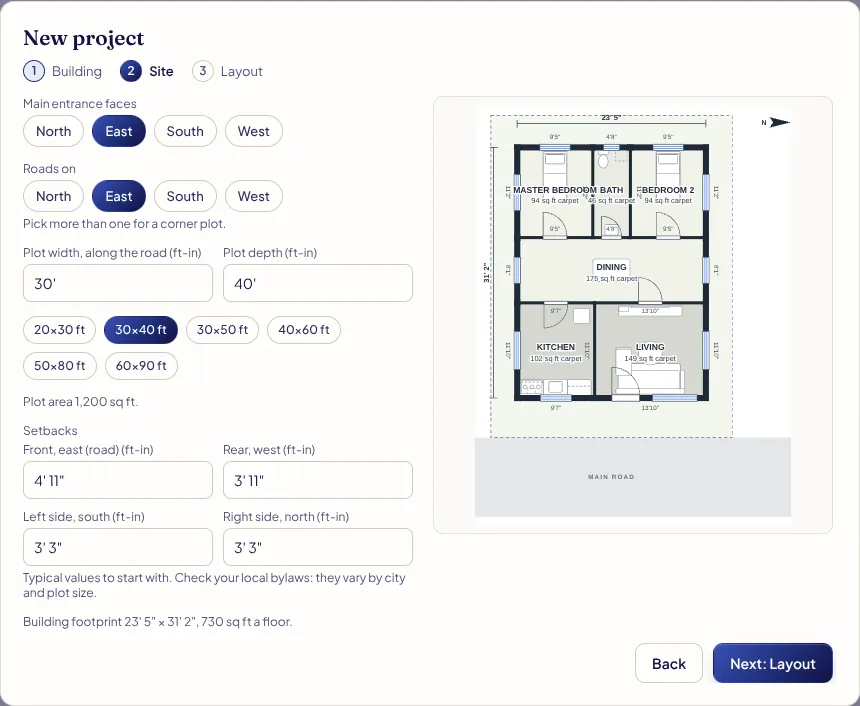
Choose Generic residential home and press Next: Site. Set Main entrance faces, tick every side with a road under Roads on, then the plot size (or a preset such as 30×40 ft). Check the Setbacks: the typical values are only a start, local bylaws vary. The footprint left to build on shows underneath.
3. Turn on stilt parking
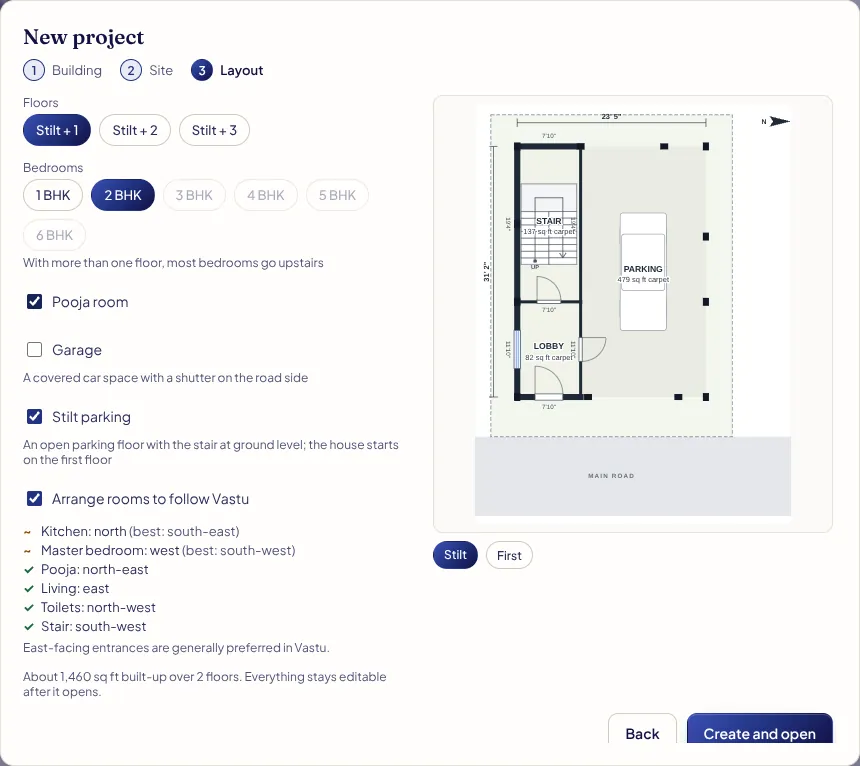
Press Next: Layout and tick Stilt parking. The Floors choices change to Stilt + 1, Stilt + 2 and Stilt + 3: pick Stilt + 1 for parking with one floor of home above. Choose the Bedrooms, Pooja room, and leave Arrange rooms to follow Vastu on if the client wants it; the list shows where each room lands. Use the Stilt and First chips under the preview to check both floors, then Create and open.
4. The stilt floor
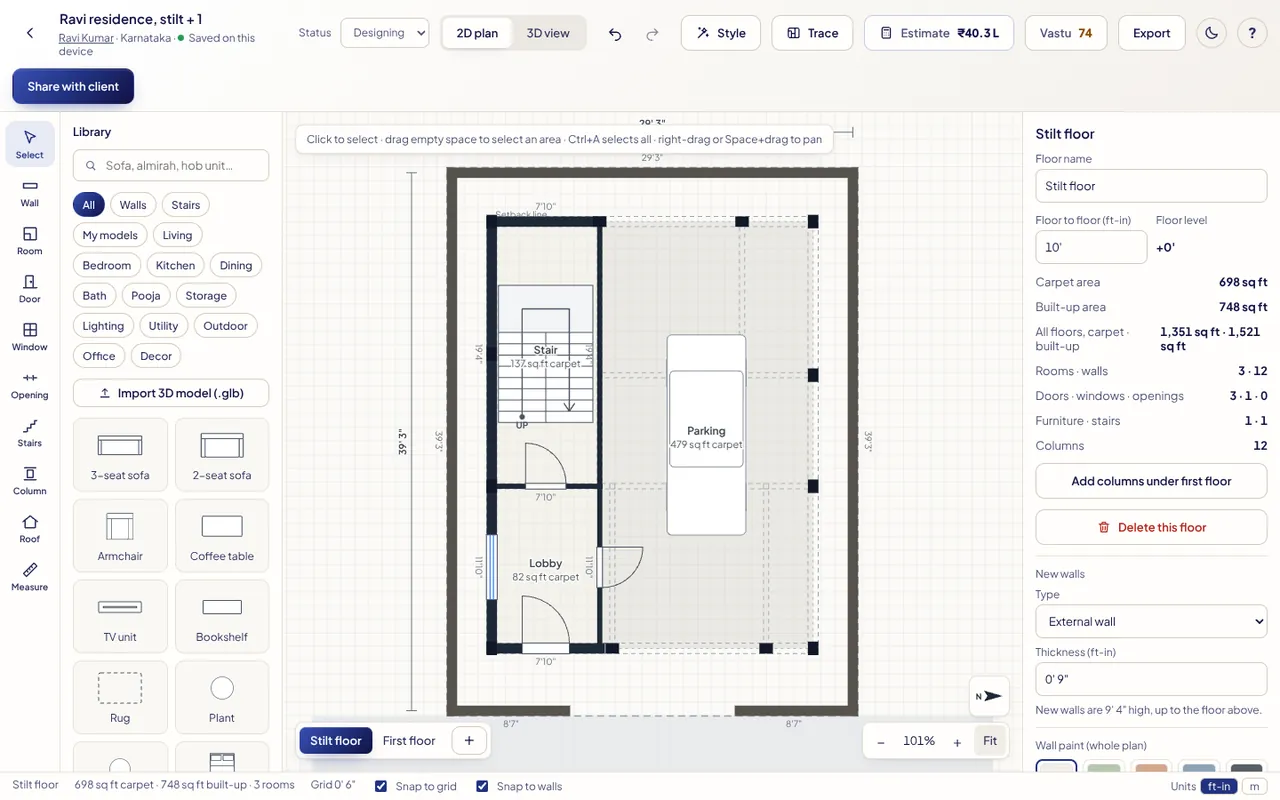
The plan opens on the Stilt floor: open parking, the stair and a small lobby with the front door, and RCC columns already placed under the corners and long walls of the floor above. The plot, roads and setback line are drawn round it.
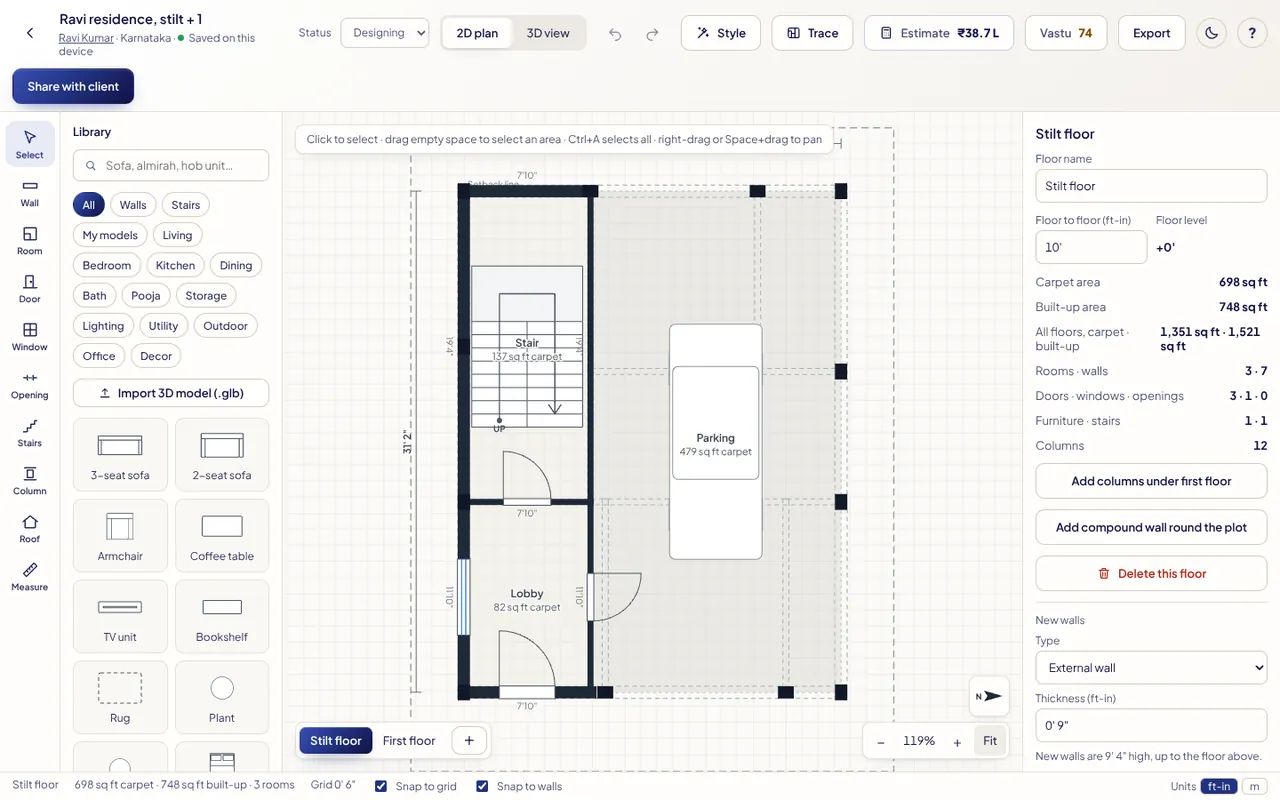
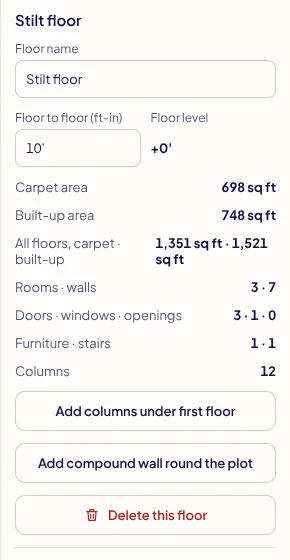
Click empty floor so nothing is selected: the panel on the right shows the floor. Set Floor to floor to the stilt height you need (the floors above move up, and the stair works out its steps again; select the stair to see Steps and Riser / tread). Move, add (Column tool, C) or delete columns as your structural engineer says. Add a watchman room, toilet or meter room with the Room tool (R).
5. The compound wall
Still on the stilt floor with nothing selected, press Add compound wall round the plot. It draws a 6' wall with a coping just inside the plot edge and leaves a 12' gap for the gate on the main road side. Select any length of it to change its height, or delete a piece for a second gate. Extra runs: Library → Walls → Compound wall.
6. The floor above
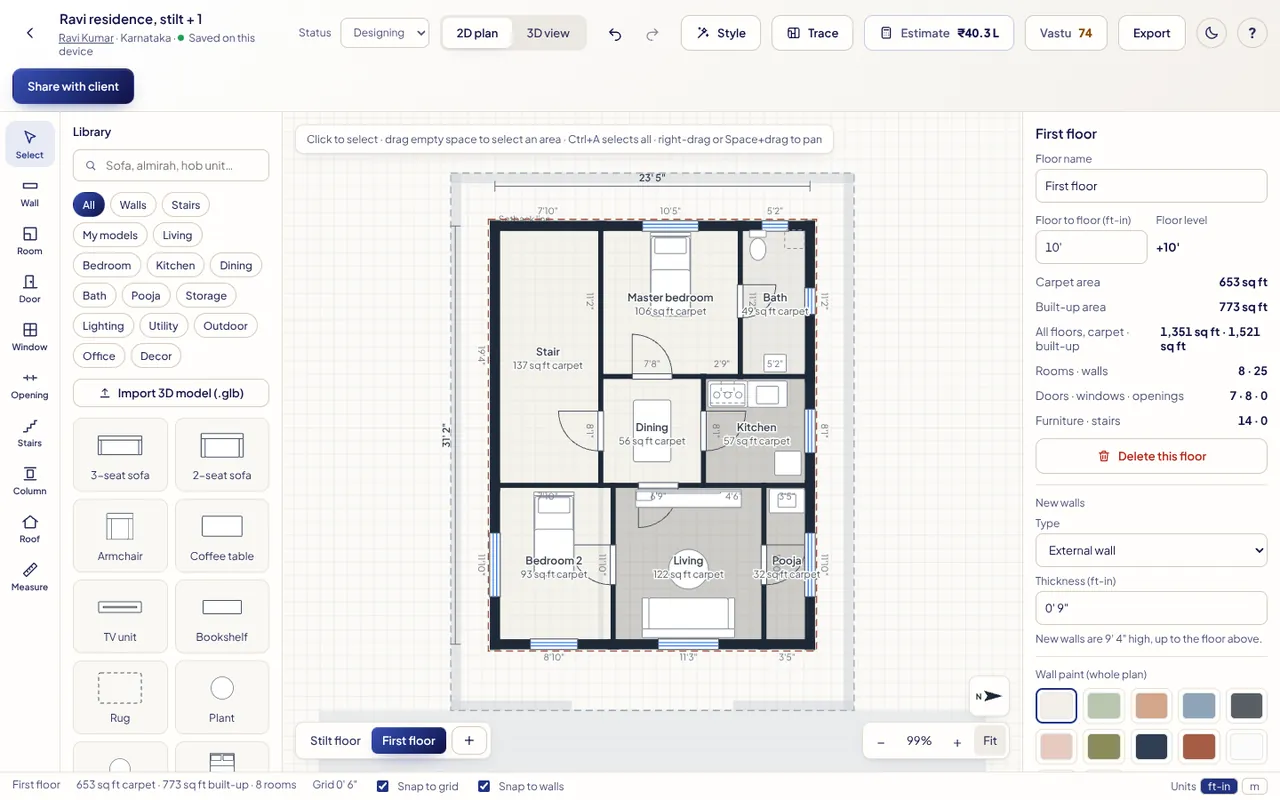
Switch to First floor in the floor switcher at the bottom left. The floor below shows faintly underneath and corners snap to it. Select a room to type its Width and Depth, select a wall to type its Length, and add doors (D), windows (N) and openings (O). Balcony: Library → Walls → Balcony railing or Parapet wall. A terrace or headroom over the stair: press + in the floor switcher.
7. Check it in 3D
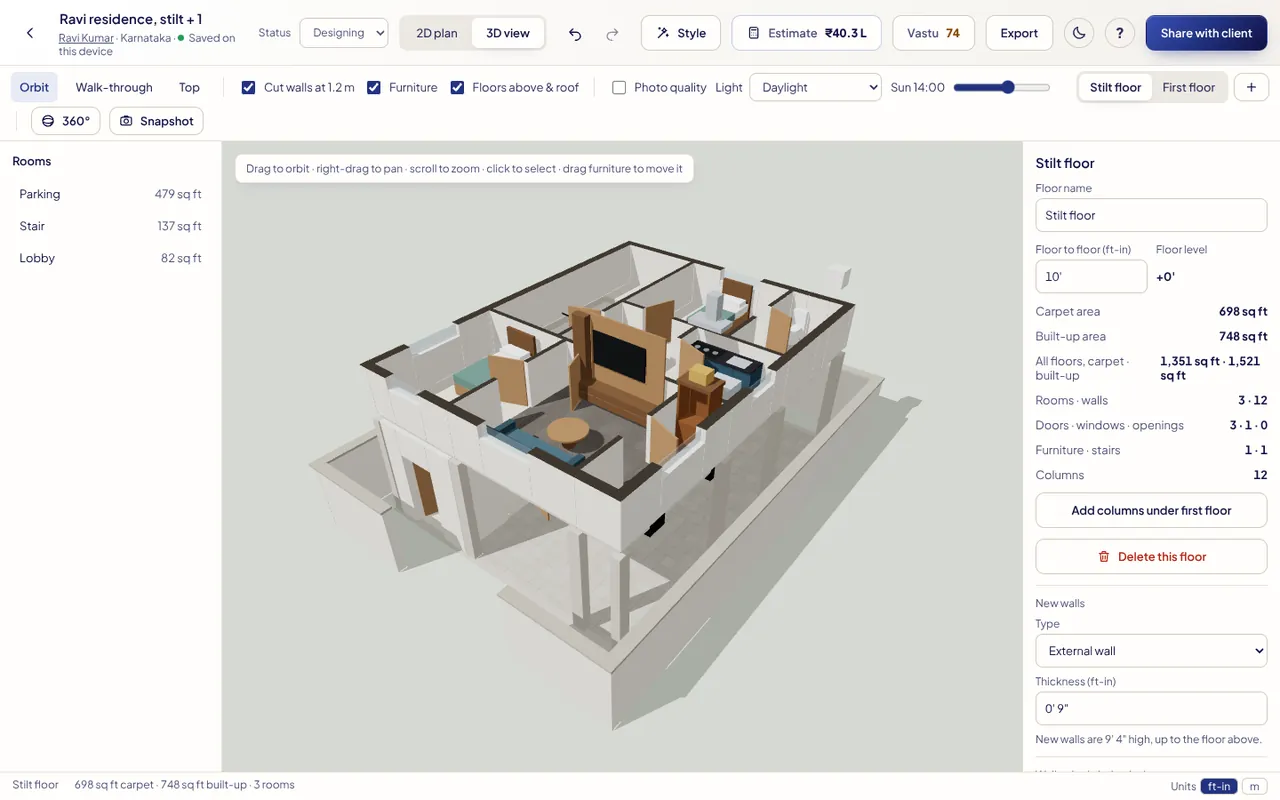
Press 3D view. With Floors above & roof ticked you see the home standing on its columns. Walk-through lets you and the client walk round inside; 360° captures room views for the phone.
Then check the Vastu chip (a quick score, and a hand-off to vaastuonline.com for the full report) and the Estimate chip (quantities and amounts, columns and compound wall included).
8. Show the client and quote
- Share with client: turn on the link and send it on WhatsApp. They can look in 2D and 3D and comment; you reply in the same dialog.
- Finish choices (in the same dialog): let the client pick flooring and wall colours.
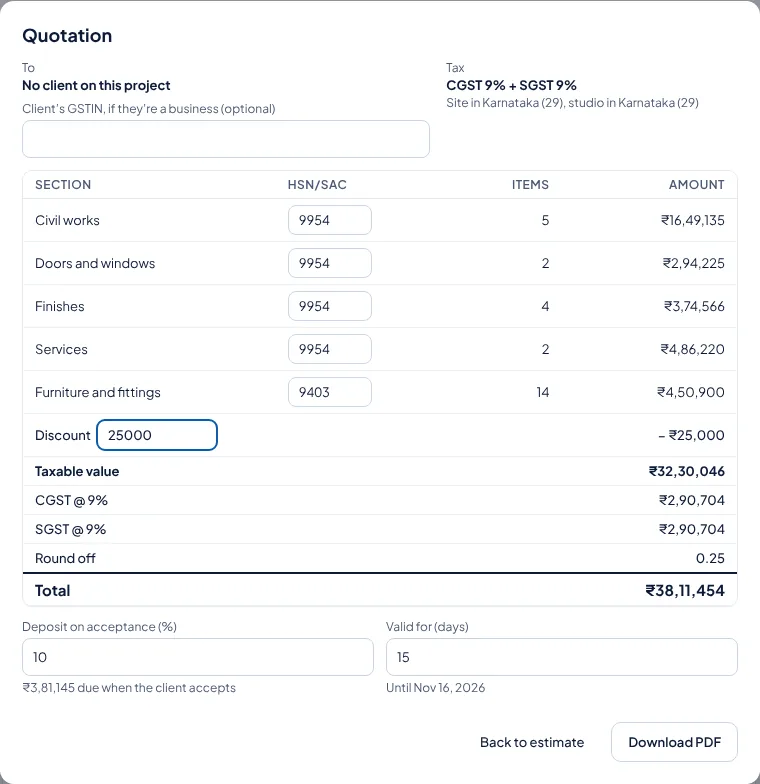
- Estimate → Make quotation: a BOQ with GST, deposit, validity and a stage-wise payment schedule. The client accepts and pays the deposit from the link.
- During the build: Site updates, Snag list and the Handover pack, all from Share with client. Export → Floor plans (PDF, all floors) for the contractor.
Bigger home? Pick Stilt + 2 and most bedrooms go to the second floor. Flats over stilt parking: use the Apartment block template instead.